WP Photo Album Plus (WPPA) is a full-featured and highly-configurable plugin to help you organize your images and display galleries on your WordPress site. The plugin is well-documented, but here are some "quick start" instructions to help you get Fotomoto set up with the plugin.
-
Install the Fotomoto Script
First make sure you've installed the Fotomoto Script as explained in How do I install Fotomoto on WordPress? -
Turn on API Mode
- If you have installed the Fotomoto Script manually or are using the WPCode snippet, append the ?api=true parameter to the Fotomoto Script:
<script type="text/javascript" src="//widget.fotomoto.com/stores/script/443665d5b1450ca39e9c84741ab5d8732de5XXXX.js?api=true"></script>
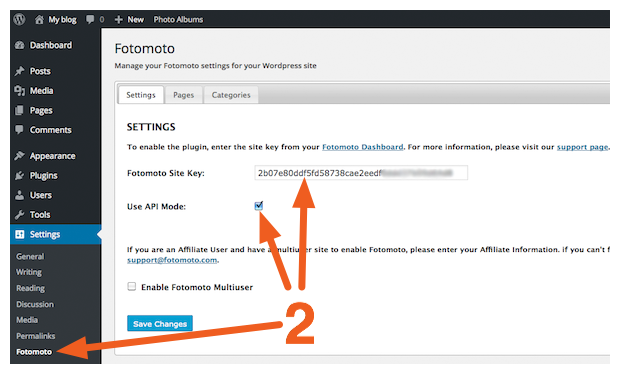
- If you are using the Fotomoto plugin, move your cursor over Settings in the WordPress Dashboard sidebar, and click "Fotomoto". Enable the "Use API Mode" checkbox, then click the "Save Changes" button
-
Turn on Buy Button visibility
Go to Photo Albums > Settings > Table II: Visibility > B Slideshow related visibility settings and make sure the text for item 15 reads "w#fotomoto". Any additional text that is in this box will display underneath your Buy Buttons.
-
Show the custom box
In the same section, also make sure the box is checked for item 14.
-
Enable Fotomoto
Go to Photo Albums > Settings > Table IX: Miscellaneous > K. External services related settings and actions and make sure the box is checked for item 6 Fotomoto.
-
You're done!
Now you should see Fotomoto Buy Buttons underneath the full-size image display in your WPPA galleries.